Tutorial | Your Plans Area
Fitain is an ever-expanding app that is packed with a plethora of rich features, which we will discuss in detail in other tutorials. However, in this tutorial, our focus will be on a key area of the app. We will break it down into easily digestible main chunks.
- Areas on Fitain.
- Your Plans Area.
- Fitain Plan Library.
Now, let's dive in.
1 Areas on Fitain
The areas on Fitain dictate the key actions you can take, depending on the specific area you're in. For example, in the Programs area, you can create, share, and initiate/start a program. In this section, we will quickly view:
- 1a - Accessing your Plans area.
1a - Accessing your Plans area.
First, let's find our Plans Area. There are three ways to access it: through the Home shortcut, the bottom navigation, or the app drawer within your area.
Home Shortcut:
- Click the 'Plan' shortcut on the left side of the screen.
Bottom Navigation:
- Click the 'Plan' Icon (3rd) in the navigation bar.
Your Area (App Drawer):
- Navigate to 'Your area,' which is the 4th icon on the navigation bar.
- Click on the 'Plans' tile.
Please note that 'My Area' is where all Fitain extensions are held, similar to an 'app drawer.' Everything within this section expands the capabilities of Fitain. All new major updates regarding features will be found here. The availability of these extra features depends on whether you are a PRO user or not.
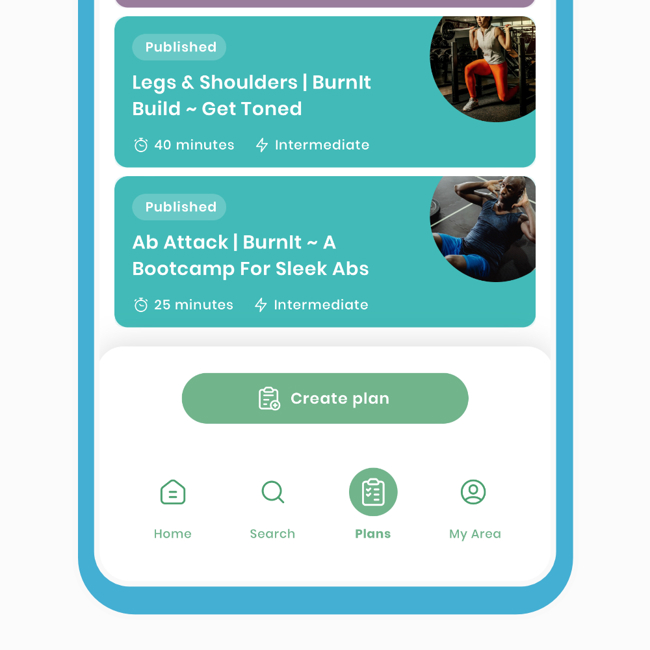
2 Your Plans Area
This is the main part of this tutorial. Your Plans area is where your created, saved, and archived plans are stored. Once you arrive, you'll see only two tabs: 'Your plans' and 'Saved.'
Since this is a significant section, we will break it down as follows:
- 2a - Your Plans Tab.
- 2b - Saved Tab.
- 2c - Notification Centre.
- 2d - Archived Tab.
- 2e - Extra.
Each of these topics will be explored in detail to give a comprehensive understanding of the Plans area.
2a - Your Plans Tab.
This is a list of all your created plans, which includes public, private, and published plans (more on that later). From this section, you will have the ability to create, complete, update targets, and fully edit your plans.
Creating Plans from scratch
Fitain offers a unique approach to creating your perfect workout of the day (WOD). We pride ourselves on providing a plan creation process that is both simple and powerful, offering a unique experience.

Here's how it's done:
- On the Saved Tab, click 'Create Plan.'
- A popup will appear. Select 'Create New' to begin the process of making a plan.
Our exercise library goes beyond physical exercises and includes mental exercises such as "box breathing." Additionally, you have access to senior and physio exercises to create your own exercise plans and WODs efficiently and easily. We have a detailed tutorial that covers plan creation in great depth.
Creating Plans from a Plan
We have provided an option for you to quickly create a plan from another plan and use it as a template. This feature allows you to copy over all the elements from the existing plan and duplicate them into the new plan.
Here's how it's done:
- On the Saved Tab, click 'Create Plan.'
- A popup will appear. Select 'Create from existing,' which will take you to the Plan Listing screen.
- Choose the plan you want to use as a template and click 'Save.'
You will now be directed to the new plan, where you can immediately begin editing. Please note that this process duplicates the old plan, allowing you to freely make edits without affecting the original plan.
Pen & Paper in 2023?
Updating Plan Targets
One of the aspects that the community truly appreciates is that our plans are designed to evolve with you. There may be times when targets become outdated, and you want to challenge yourself even more. We have made the process of updating targets simple, so there's no need to worry.

Let's Update Plan Targets:
- Select the plan you want to update the targets on, and you will be taken to the Plan Overview screen.
- On the top right, click the 'more options' button (three dots).
- Choose the 'update targets' option, and you will be directed to the Update Targets screen.
- Input all your new targets and click 'Save.'
Congratulations! You have successfully overwritten the initial targets to customise the plan according to your preferences. This update process can be applied to any plan on Fitain, unless it is part of a program where specific targets are typically assigned on a weekly basis.
Editing Created Plans
For the plans you have created, you have the flexibility to edit both the structure of the plan and its details at any time.
Here's how to edit:
- Select your plan and navigate to the Plan Overview screen.
- Click on the 'Pen' icon next to the description to edit the details such as the description, title, interests, and more. Alternatively, click on the 'Pen' icon next to exercises if you need to modify the entire structure of the plan.
- Make the desired edits and save your changes.
Please note that if these plans are linked within programs (related to original), any modifications made will also reflect in the associated programs.
2b - Saved Tab.
This list includes all the plans you have received from a connection and saved from the library. We will cover the Plan library in more detail later on.
To access your Saved Tab:
- Go to your Plans Area, and select the 'Saved' Tab.
- Alternatively, if you've received a plan, click on the app notification, and it will directly bring you to the plan.
This smoothly transitions us to the Notifications Centre.
2c - Notification Centre.
If you happened to miss the notification, you can alternatively open the app and navigate to your Notification Centre.
To access the Notification Centre:
- Open the app and navigate to the Home section (first button on the navigation bar).
- Look at the top right and click on the Bell Icon. This will take you to the Notification Centre.
The Notification Centre serves as the central location for all the notifications you receive. It includes notifications for various activities such as receiving plans, programs, bookings, and notes on bookings, among others.
2d - Archived Tab.
All deleted plans will be stored in this section for a certain period of time. You have the option to restore any plan from this list, which will make it reappear on your created or saved tabs.
Archiving a Plan
The plan will be removed from both your created and saved plan tabs, reducing clutter in your area. By doing so, it helps keep your created and saved tabs organised and uncluttered.
Archiving through More Options:
- Select the plan you want to archive.
- Click on 'more options,' represented by three dots located at the top right corner.
- Choose the 'Archive' option. A popup dialogue will appear to confirm your decision. Click 'Yes,' and the plan will be moved to the archive list.
Alternatively, you can swipe left on the Plan tile and select the 'x' icon to quickly archive it.
Restoring a Plan
In the archive list, you'll notice that the plan tiles appear faded, indicating they are in a deleted space but retrievable.
To Restore a Plan:
- Select the plan you want to restore.
- Click on 'more options' (represented by the three dots) and choose 'Restore'. A popup dialogue will appear to confirm your decision. Click 'Yes,' and the plan will be moved back to the saved tab (if received) or created tab (if created).
The 'Restore' icon used for the plan is the same as the one used for the 'Redo' exercise item in Plans.
2e - Extra.
Here, we will explore the additional functionalities available in this area, including Active Plans, Help, Filter, Copying to Clipboard, Sharing, and Historic logs. Let's begin.
Pen & Paper in 2023?
Active Plans - Plans Running in the Background
When you 'Begin' a plan, it continues to run in the background. We have implemented this mechanism to ensure that you can seamlessly resume from where you left off. We understand that life can sometimes interrupt your fitness journey, and we don't want you to lose your progress. Therefore, we provide this fallback option to save your progress. Here's how it works:
- On the Plan Progress screen, click the 'x' at the top right or swipe down from the top.
-
A popup will appear, asking if you want to save your progress. Click 'Save'. You will then be taken to the Plan Overview screen, where you will notice changes in the bottom actions. This serves as the first indicator.
The second indicator is to navigate to your Plans Area and check the 'Active' section.

- Navigate to the Plans Area and view the list of active plans at the top.
We've got your back in case of unexpected events. These fallbacks and safety measures are designed to support you throughout your fitness journey.
Help
Depending on your location within the app, we have prepared a set of questions and answers to assist you in maximising your experience with Fitain.
To access Help:
- Look at the top right of the screen and click on the '?' symbol. This will take you to a different screen where you can select various questions.
You will notice a pleasant animation that accompanies the text. We have designed this feature to be concise, direct, and straight to the point, ensuring a user-friendly experience.
Filter
You have the ability to filter your plans based on various criteria such as duration, difficulty level, muscle group, and more.
To access the filter:
-
Look at the top right of the screen and click on the filter icon. This will take you to a different screen where you can choose various filter options, similar to the search function.
-
After selecting your desired filter options, click 'done,' and the filtered results will be displayed in the list.
By selecting specific criteria to filter on, you can narrow down your initial search and find plans that align with your preferences.
Copy to clipboard
The clipboard feature is one of the most significant and valuable updates introduced to Fitain. With this functionality, you can easily copy a plan and paste it into a specific day within a program. This allows for seamless organisation and integration of Plans and Programs within your fitness journey.

To utilise Copy and Pasting to Program days:
- Select the plan you want to copy and navigate to the Plan Overview screen.
- Look at the top right and click on 'more options' (represented by the three dots), then click 'copy to clipboard.'
- Edit a created program and choose a specific day.
- Select 'Add item' and click 'paste from clipboard.' You will see the copied plan presented. Select it and click 'done.'
In this context, you have the ability to copy an unlimited number of plans to the clipboard. But it doesn't end there—you can also copy days and weeks to the clipboard. Right from the beginning, we understood the importance of different parts of the app working seamlessly with each other. That's why we continuously mention plans and programs, as they are interconnected behind the scenes. This functionality will save you a significant amount of time and effort when constructing programs.
Sharing Plans, Public & Private Status
Within the app, you have the option to share plans with your connections or externally through a link. For this tutorial, we will focus on sharing plans privately. Sharing plans outside the app, known as publishing, will be discussed in a separate tutorial specifically for PRO users. Now, let's explore the distinction between Public and Private plans.
Private Plans
All plans are set to private by default, which ensures that they are not visible to anyone unless you explicitly share them with a connection.
This feature is particularly useful in scenarios where you are training a client and want to send them a private plan to follow at their convenience. It can also be used to send private plans to family and friends, among other possibilities. The default privacy setting provides you with control over who can access and view your plans, maintaining the confidentiality and personalised nature of your fitness journey.
Sharing with Connections
This feature facilitates seamless sharing and collaboration between users, enhancing the experience of sharing fitness plans within the Fitain community.
To Share a Plan with Connections:
- Select the plan you want to share and navigate to the Plan Overview screen.
- Look at the top right corner and click on 'more options' (represented by the three dots), then click on 'send to connections.'
- Choose the specific connection you want to send the plan to and click 'send.'
By following these steps, the selected connection will receive a notification within the app. When they click on the notification, they will be directed straight to the shared plan, allowing them to access and view it conveniently.
Public Plans
When you mark a plan as 'public,' it becomes visible to your connections, who can navigate to your profile and explore the available public plans. This feature fosters a sense of community and sharing within the Fitain platform, enabling you to contribute to the fitness journeys of others while building connections and engagement.
Make a Plan Public:
-
Select the plan you want to make public and navigate to the Plan Overview screen.
-
Look at the top right corner and click on 'more options' (the three dots), then choose 'Plan Status'.
-
In the Plan Status screen, flick the switch to make the plan public, indicating that it can be viewed by connections.
-
Once you have made the plan 'public', swipe down or press the 'cross' button at the top right to dismiss the screen.
If you want to share the public plan with your connections within the Fitain app, you can also follow the same steps mentioned earlier for sending plans to connections. This allows your connections to easily access the plan and benefit from it.
Pen & Paper in 2023?
History Logs
In Fitain, you have the ability to view your previous logs for a plan. These logs are time and date stamped, allowing you to track your progress over time.
To Access the History Logs:
-
Select the plan for which you want to view the history logs and navigate to the Plan Overview screen.
-
Look for an option or icon related to history. Click on it to access the history view.
-
Once you enter the history view, you will see a list of your previous logs, each accompanied by a timestamp indicating when it was recorded.
By reviewing the history logs, you can track your past performance, monitor improvements, and analyse your fitness journey. It provides a valuable record of your activities and progress over time.
Please note that the specific steps to access history logs may vary slightly depending on the Fitain app's interface and design. However, the general concept remains the same – accessing a dedicated section or option to view your previous logs with timestamps.
3 Fitain Plan Library
Fitain provides all users with access to a public plan library that contains professionally crafted and vetted plans. These plans are carefully curated by the Fitain team to ensure high quality and effectiveness. Only professionals are allowed to submit their plans to the library, which adds a unique proposition to the content available. Professionals can showcase their expertise and offer their plans to be discovered by users. These plans can be shared outside the app through various means such as text messages, email, social media, and more.
Let's explore the key aspects of Fitain's public plan library:
- 3a - Saving Plans to Your Area.
- 3b - Receiving Plan Updates.
- 3c - Add Saved Plans to Your Programs.
3a - Saving Plans to Your Area.
When you come across a plan in the public plan library that interests you, you have the option to save it to your personal area. By saving a plan, you can easily access it later and incorporate it into your fitness journey. This feature allows you to curate a collection of plans that align with your goals and preferences. Let's see how it's done.
To Save Plans to Your Area:
-
Start by going to the search function within the app and selecting 'Plans.' The app will automatically pre-select your interests to provide you with relevant choices. Click on 'Show me' to proceed.
-
Explore the list of plans and find one that catches your interest. Once you've found a plan you like, select it. At this point, you have two options: you can either begin the plan right away or save it for later. Choose the "save" option to store the plan in your personal area. Both options will save to your area.
-
To navigate back to your plans area, press the 'back' button located at the top left corner of the screen. This will take you to the main plans area.
-
Within your plans area, go to the 'saved' tab. Here, you will find all the plans that you have saved. This tab serves as a centralised location for all your saved and received plans.
In addition to saving plans for your personal use, Fitain also offers the option to share plans with others via a link. If the plan you have saved is a published plan from its original owner, you can share it with others by clicking on the share icon. Sharing plans allows you to spread the fitness journey and knowledge with others in a caring and supportive manner.
3b - Receiving Plan Updates.
As plans in the public library are created and updated by professionals, you have the advantage of receiving updates to those plans. This means that if any changes or improvements are made to a plan you have saved, you will be notified and can benefit from the latest version. This ensures that you stay up-to-date with the most current and effective plans available.
To Update a Plan:
-
Begin by using the search function in Fitain and navigate to the plan you wish to update. This will bring you to the Plan Overview screen, where you can find additional details about the plan.
-
As you access the plan, you may notice a popup notification appearing from the bottom of the screen, indicating that the plan has been updated since the last time you added it to your personal area. To ensure you have the most recent version of the plan, click on the 'save' button in the popup.
After clicking 'save,' the updated version of the plan will be stored in your personal area, specifically under the 'saved' tab. You can now access and use the new version of the plan, which reflects any changes or improvements made by the plan's creator. If you still have the old version of the plan in your area, you have the option to archive it, helping you keep your plans organised and up to date.
3c - Add Saved Plans to Your Programs.
Fitain also offers the flexibility to mix and match plans from the public library with your existing programs. This means you can incorporate individual plans from the library into your customised program, tailoring it to your specific needs and preferences. This feature allows for greater versatility and personalisation in your fitness routine. Assuming you already have a saved plan, here's how to quickly do this:
Adding saved Plans to a Program Day:
-
In a Program, select the desired day you want to add a Plan to.
-
Click on 'Add Item' and choose 'Add a plan' from the menu.
-
Navigate to the 'Saved' tab, select the plan you want from the list, and proceed to its plan overview screen by clicking 'Next.'
-
On the plan overview screen, enable the 'Relate to Original' switch (to receive automatic updates). Finally, click 'Add plan' to complete the process.
Fitain sets itself apart from typical fitness apps by embracing a different philosophy when it comes to health and fitness. The possibilities and functionalities offered by Fitain go far beyond what is covered in this brief overview, and the app continues to evolve and introduce stronger features to enhance the user experience.
One of the key aspects of Fitain's growth is the expansion of its public plan library. This library will continue to grow and diversify as more professionals submit their plans. Each professional brings their unique style and expertise, ensuring a wide range of options for users. This community-driven approach to fitness planning ensures that the content in the library is generated by users themselves, creating a rich and varied collection of professionally curated plans.