Tutorial - Program Builder | Day Items
Now that we've created the structure of the plan, including a week and a day, we can proceed to add actionable items for the day. Let's break this down as follows:
- Saved Plans into Program
- Relating to Original
- Creating Plans within the Program
- Adding Rest Days
- Editing Items
- Deleting Items
The extract below was taken from a larger tutorial.
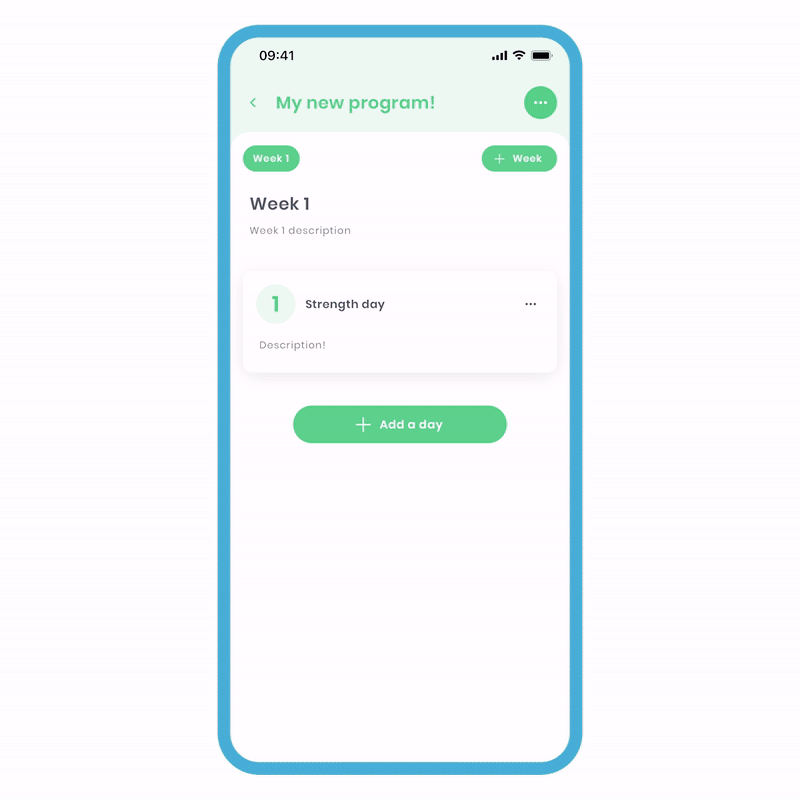
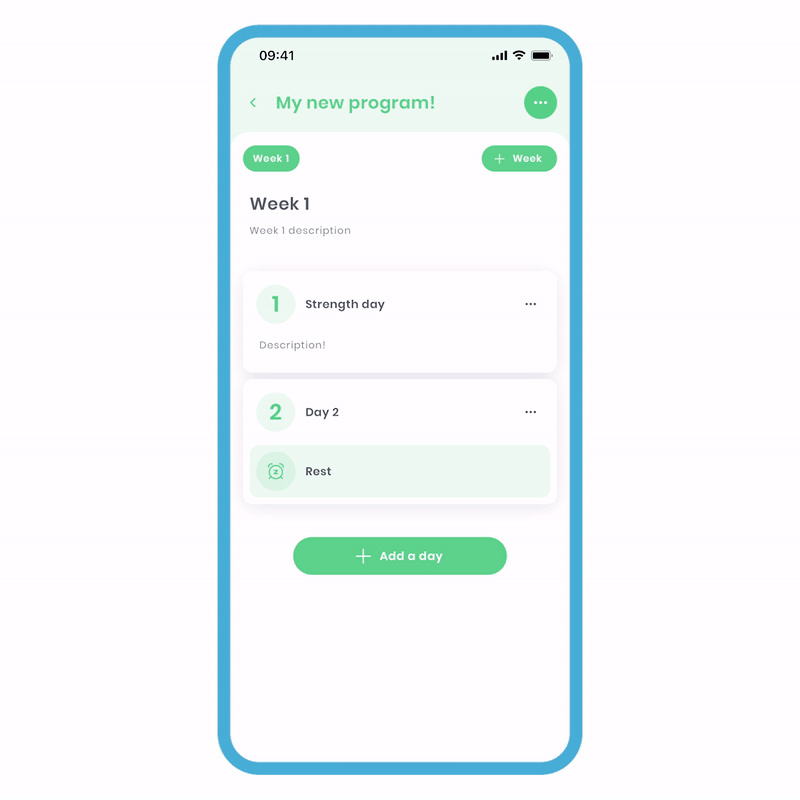
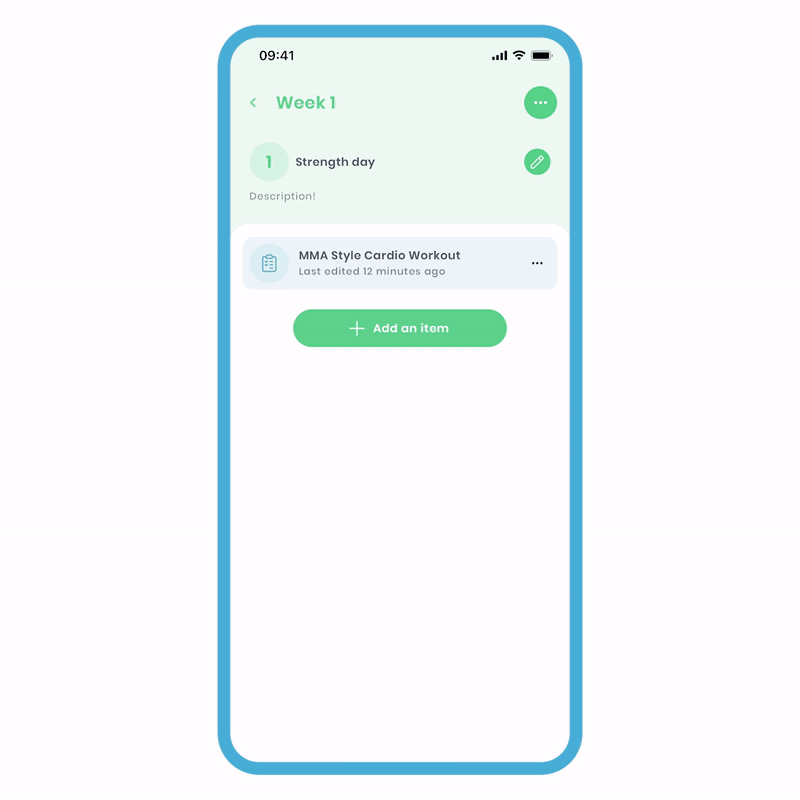
Once a day has been added, go inside it by clicking anywhere on the tile except the 'more options' (three dots).
1 Saved Plans into Program
We've always loved the idea of a pick 'n' mix system. You're welcome to save a plan from our public library, which is built by professionals, and schedule it for specific days.
To do this:
- On the main 'Edit Program' screen, click on the day tile. You should be in the day.
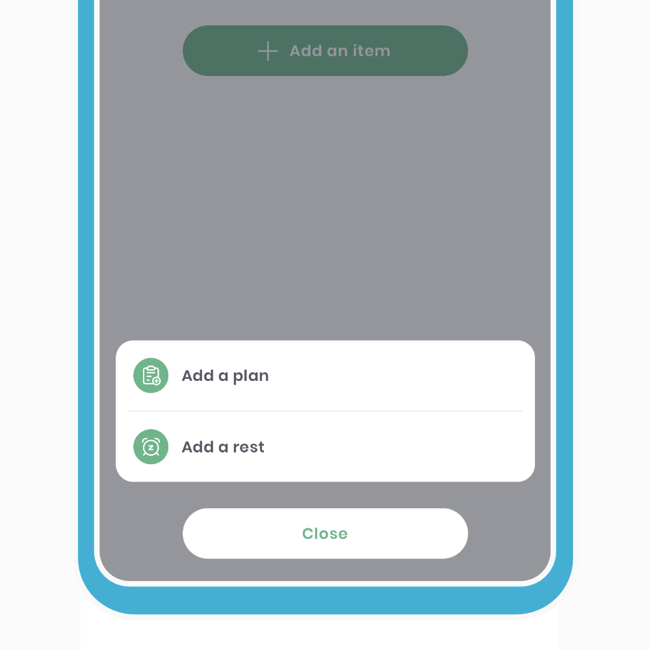
- Click 'Add an item' and then select 'Add a plan.' You'll now see a list of all your available plans. Click the 'Saved' tab at the top, and your saved plans will appear in this list.
- Select the plan you want to be brought to the 'Plan Overview' screen. Click 'Next' and update your targets if you wish. Click 'Add plan,' and you will have successfully added a plan to the day.
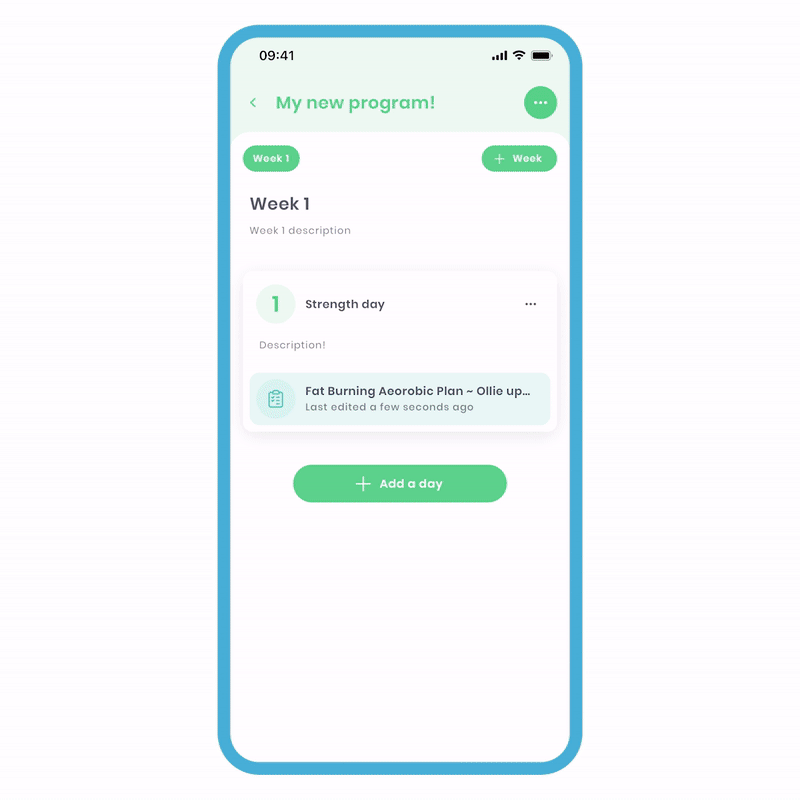
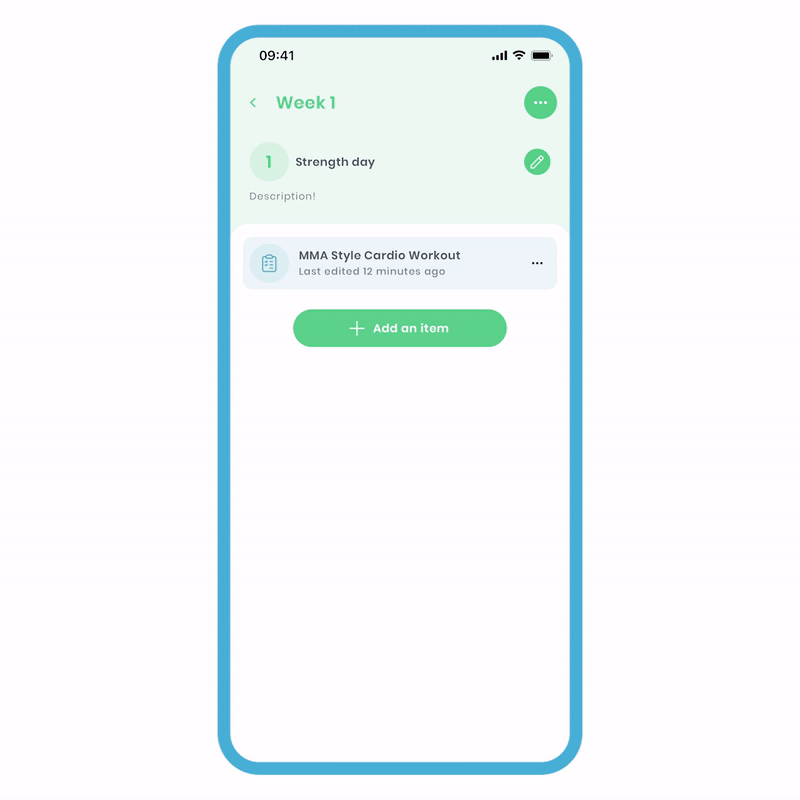
As mentioned before, also in this list are those plans you've been sent from a connection. You'll notice on the item tile, you have subsidiary text to aid you in knowing when the item was 'last edited.'
It should also be mentioned that adding a plan creates a copy of the original, allowing you to freely edit it. This is handy if you plan on using the original as a template and making adjustments as needed.
2 Relating to Original
This utilises the master copy of the plan. It's suitable when the plan remains the same throughout the entire program. Any edits made here will alter the master copy and every instance where it is used, so be cautious.
However, if you want to keep the plan structure and change the metrics week by week, relating to the original is the perfect choice. This will ensure that all the metrics are linked in your history (requires update 3.5.1+).
To relate to the original:
- On the main 'Edit Program' screen, click on the day tile. You should be taken to the day view.
- Click 'Add an item' and then select 'Add a plan'. You'll now see a list of all your available plans.
- Select the plan you want to bring to the 'Plan Overview' screen. Click 'Next' and update your targets if you wish.
- Turn on the 'Relate to original' toggle, then click 'Add plan', and you will have successfully added a plan to the day.
Please note that to change the plan structure, this must be done outside the program. If this is done, all the areas where you have related this particular plan will be updated accordingly.
3 Creating Plans within the Program
By doing this, you'll create a plan that exclusively belongs to that program. The process is the same as creating any other plan.

To create a one-off plan in the program:
- On the main 'Edit Program screen', click on the day tile. You should be taken to the day view.
- Click 'Add an item' and then select 'Add a plan'. You'll now see a list of all your available plans, and you should be on the 'Created' tab at the top.
- Click the 'Create new plan' button at the bottom.
- On the popup, you can either 'save' this plan to be in your area or 'skip' to keep the plan within the program. Click 'skip', and you'll be launched into the plan builder.
- Create your plan as you see fit.
This can be extremely useful if you don't want to clutter up your plan area with unnecessary content.
4 Adding Rest Days
Rest days can be important to your program, and we've created a mechanism that allows you to create them quickly. There are two methods to achieve this.
Adding a new rest day using the quick method:
- On the main 'Program Edit' screen, click the 'Add a day' button.
- Select the 'Add rest day' option, and this will quickly add a day with a rest item inside it.
If you want to add other items within the day, click on the day tile, and you'll be taken inside the day. Now, you can freely add other items.
Using the 'Within the day' method:
- On the main 'Program Edit' screen, click the 'Add a day' button.
- Select the 'Add new day' option, and you'll be taken inside the day.
- Click 'Add an item' and select the 'Add a rest' option. Now a rest item will be added on this day.
This leads us nicely to editing the items within the day.
Pen & Paper in 2023?
5 Editing Items
By clicking on the main body of the item tiles you've just added, you'll be able to edit them depending on the type of item.
Rest items
You'll be able to add a description and title, just like when editing details of the day and week.
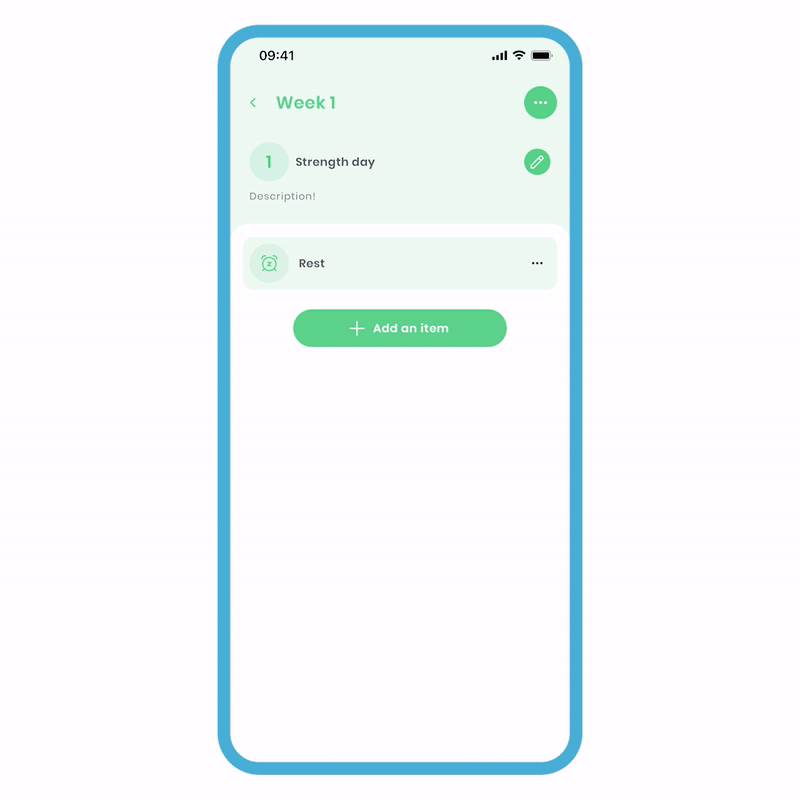
To edit a rest item:
- Click on the rest tile, and you'll be taken to the 'Edit Rest' screen. Here, you can write a title and description.
- Write your message and click 'Save'.
This can be useful if you want to add a personalised message when the completer reaches this day.
Plan items
By clicking on the plan item tile, you'll be able to edit the plan directly within the program.
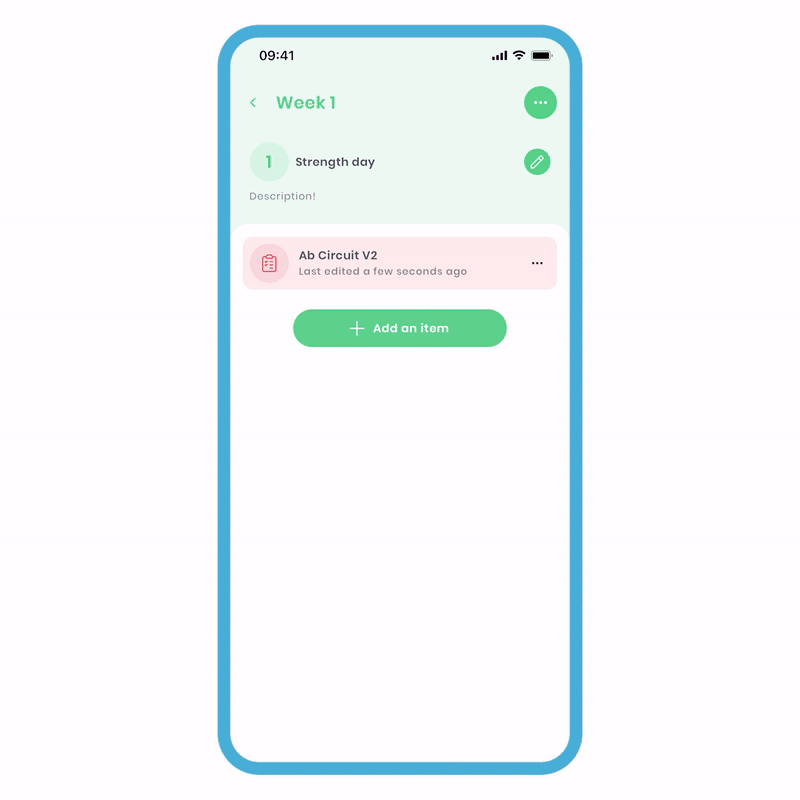
To edit plans within the program:
- Click on the plan tile, and you'll be taken to the 'Edit Plan' screen. Here, you can make the appropriate edits.
- Click 'Done,' and a popup will appear to confirm your decision. Click 'I'm done,' and all your changes will be saved.
You'll notice the subsidiary text on the tile will have changed as it informs you of the last time you've updated the item. It should be noted that if a plan is not related to the original, then you'll be brought to the plan edit.
Related Plan items
These items mean that only the metrics can be changed, and the screen will reflect this. It is possible to change the metrics week by week without affecting the original. Your history will show the corresponding arrows as the relationships between plans are still linked. This is perfect for techniques such as progressive overload.
To edit related plan items:
- Click on the plan tile, and you'll be taken to the 'Update Targets' screen. Here, you can make the appropriate edits.
- Click 'update,' and the changes will be saved.
To change the structure of a related plan, this must be done outside the program. Takeaway points from this would be: if you select the plan tile and it:
- Allows you to edit the plan entirely, then it's not related and will not affect the master.
- Only allows you to edit the targets, it's a related plan.
6 Deleting Items
On the tile, you'll notice the 3 dots to the right. This is the 'more options' button, which extends your capabilities. The process is the same for nearly all items on Fitain.
To delete an item:
- Click 'more options' (3 dots) on the right of the item and select the 'Delete' option.
- On the popup, press the 'Delete' button, and your item will be deleted.