Tutorial - Plan Builder | Adding Rests
Rests can be easily incorporated in both the plan overview edit screen and within a group. Additionally, we offer options to duplicate, edit, delete, and sort.
To begin, let's simply add a rest item:
- Click 'Add', 'Add Rest'.
- Select your time from the presets or manually enter it.
- Click 'Done'.
Editing the Rests
Great job! Now, suppose you wish to change the 30-second rest to a 1-minute duration. Not a problem! Here's how you can easily edit and make the necessary adjustment:
- Select the Rest Item.
- Choose your time by selecting from the available presets or manually enter the duration.
- Click 'Done'.
Sorting Plan Items
Now, let's discuss sorting plan items. When you navigate to the sort screen, you'll notice icons on the left to differentiate between rests, groups, and exercises. Let's try it out!

To sort your plan items, follow these steps:
- Click 'More Actions' (the circular icon at the top right).
- Select 'Sort'.
- Press and hold the item you want to move. As you do, a progress bar will fill up to confirm the correct item is selected.
- Continue holding and drag the item to its new position.
- Release the item.
- Click 'Done'.
On the left side, you'll find the original position number. In case of any mistakes, you can easily undo all your changes using the 'Redo' button located at the top right (arrow symbol).
Wizard View and Rests
When you start a plan, you gain the ability to track and log your progress with the exercises, which will appear in your History.
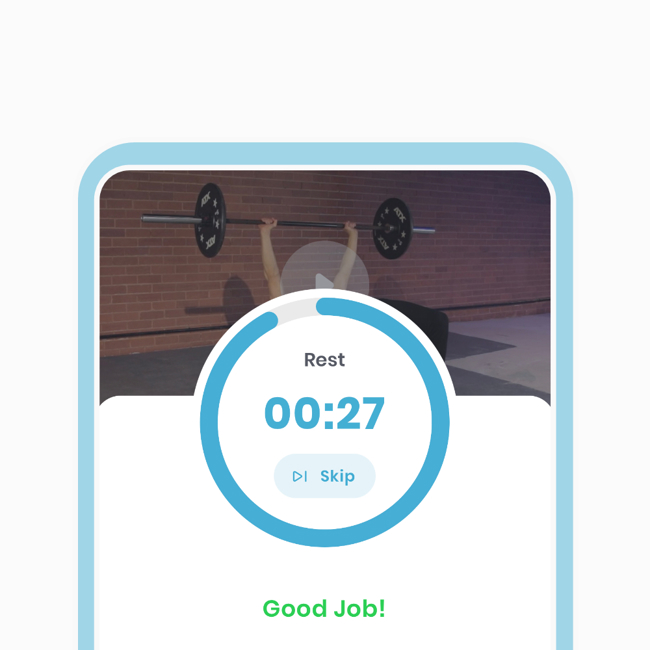
For this tutorial, we'll focus on the Wizard View, where rests are exclusively visible. Now, let's celebrate the outcomes of our hard work and witness the achievements we have made!
To start the Wizard view:
- Navigate to the plan overview screen.
- Click 'Begin' to enter the active plan state, where the duration of the entire plan is automatically timed.
- Select the flashing exercise item to enter the Wizard View instantly.
- Complete the exercise, and you'll encounter the Rest period. Pretty cool, right?
Escape Costly Solutions.
Now, let's explore some advanced techniques with Rest periods.
Rests in Between Exercises
Another valuable technique to utilise is our built-in feature that allows you to add rests between items seamlessly. After adding rests, it's recommended to preview your progress.
In this example, let's focus on inserting a rest between two exercises:

Alright, let's get started:
- On the main screen, click 'Add' and then 'Add an exercise'.
- Enter relevant keywords or apply filters to find the desired exercise. For example, search for 'BB Bench press' (you can also use abbreviations like 'BB' for Barbell or 'DB' for Dumbbell).
- Click 'Apply'.
- Select the exercise and click 'Next'.
- On the Add Item screen, enter the desired number of repetitions or sets in the repeat reps/sets field.
- To include rest intervals between sets, select the 'rest between sets' field and choose the desired duration. Please note that this field is available when the item is repeated at least twice.
Now, let's take a comprehensive look at the entire plan by clicking on the 'Preview' button:
- Navigate to the main edit screen (if you're currently in a group).
- Select 'More Actions' (three dots located at the top right).
- Click on 'Preview'.
And voilà! You'll be able to see the preview of your plan.
Rests Between Groups
The same mechanism also applies to groups. What's special about this is that you're not limited to a single exercise. All the exercises within the group will be repeated, and a rest will be inserted between each group. Now, let's focus on repeating a group and adding rests in between.
The steps to repeat a group and add rests in between are as follows:
- Click on 'Add' and then 'Add a group'.
- Select the desired number of repetitions for the group. In this example, let's choose '3'.
- Click on the 'Rest Between Sets' field.
- You will be directed to the Duration Screen. Select or enter the desired duration, and click 'Done'. You will return to the previous screen.
- Click 'Done', and you will enter the new group.
Notice the '3x' indicator at the top left, indicating the number of times the group is being repeated.
Now that you're inside the group, let's add some exercises:
- Press 'Add', and then 'Add an exercise'.
- Type in the keywords 'BB Bench Press' and click 'Apply'.
- Find the desired exercise, select it, and press 'Next'. This will take you to the Add Item screen. Click 'Next'.
- You will then arrive at the 'Add Targets' screen.
Here's an important note: Since the group has been repeated multiple times, you will have three sets of targets to fill out.
You have the option to input the same metric and click 'Autofill', which will automatically fill out the remaining fields.
Alternatively, you can input different targets for each round. How cool is that?
And finally, let's get a glimpse of what the plan looks like by previewing it:
- Navigate to the main edit screen.
- Select 'More Actions' (three dots located at the top right).
- Click on 'Preview'.
And that's Rest Items 101! We hope you'll find all these mechanisms useful when constructing your workout plans. We're excited to see your plans in action, so go ahead and create, create, create!