Tutorial | History Area

The History Area is special because it offers a centralised location for your personal health and fitness journey. You own your data, and all sessions and plans are logged for convenient review. It's like JustEat, but for your fitness journey. You can seamlessly navigate through sessions, classes, plans, and programs. By owning your data, you have possibilities like sharing it with a physiotherapist for more effective treatment. In this tutorial, we'll cover:
- Accessing Your History
- History Area Overview
1 Accessing Your History
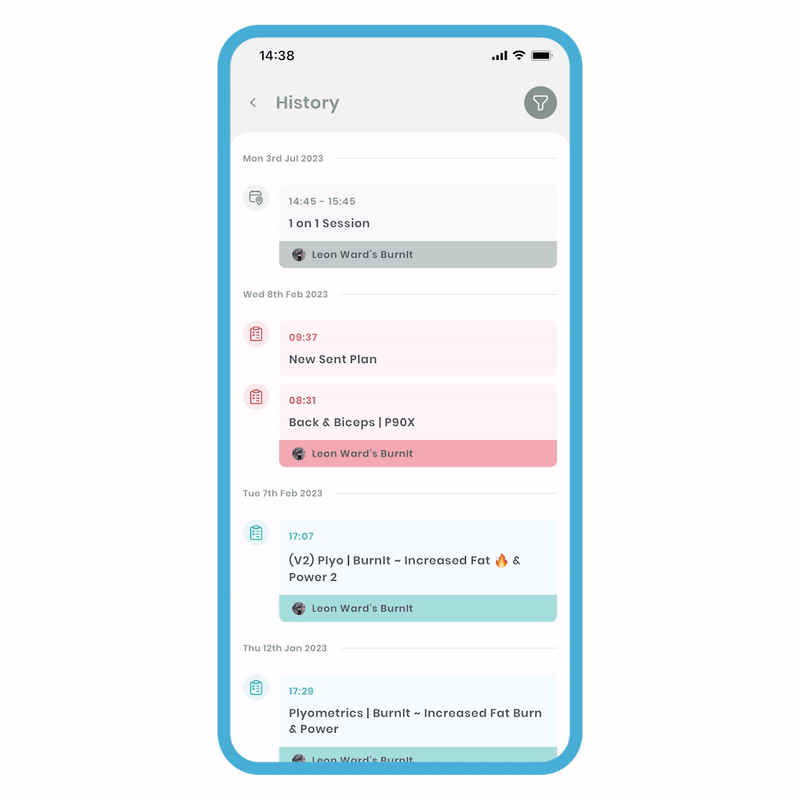
You can access your history area to view all your session and plan tiles. Clicking on any tile will show its historic version. Specifically, for a completed plan, you'll be taken to its historic version with additional options. In this tutorial, we'll cover two ways to access your history:
- 1a - Accessing through your area.
- 1b - Accessing from plan completion.
1a - Navigating to your History Area.
Your History Area is a powerful tool that empowers you to make informed decisions. Here, you can access the Plans you've completed and the sessions you've attended, allowing you to track your progress and make meaningful choices based on your fitness journey.
To access your History Area:
-
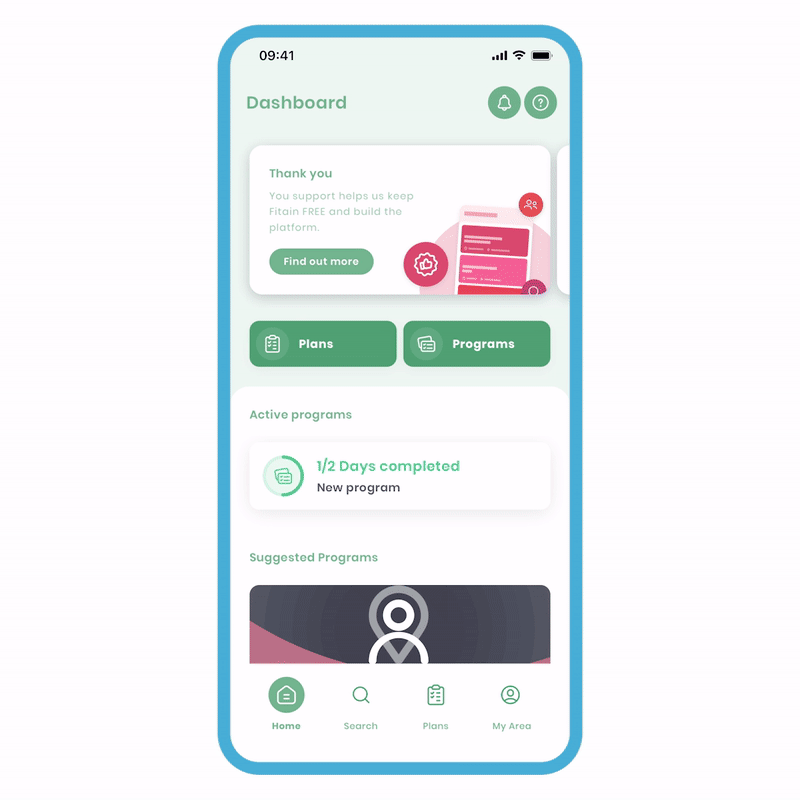
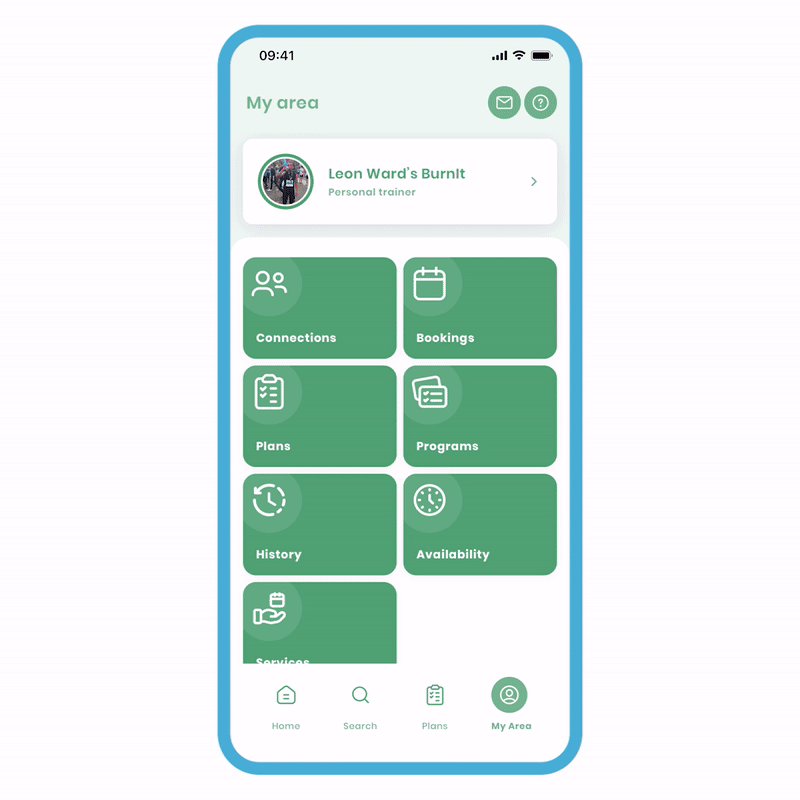
Navigate to 'My Area' by selecting it from the navigation bar.
-
Click on the 'History' tile to enter your history section.
'Your Area' serves as an expanded app drawer, providing enhanced functionalities within Fitain. Whether you're a professional or not, everyone has access to their history, making it a valuable feature for all users.
1b - After completing a Plan.
After finishing a plan, you can easily review all the associated loggings, including metrics and notes. This allows you to track your progress and gain valuable insights.
Quick Log
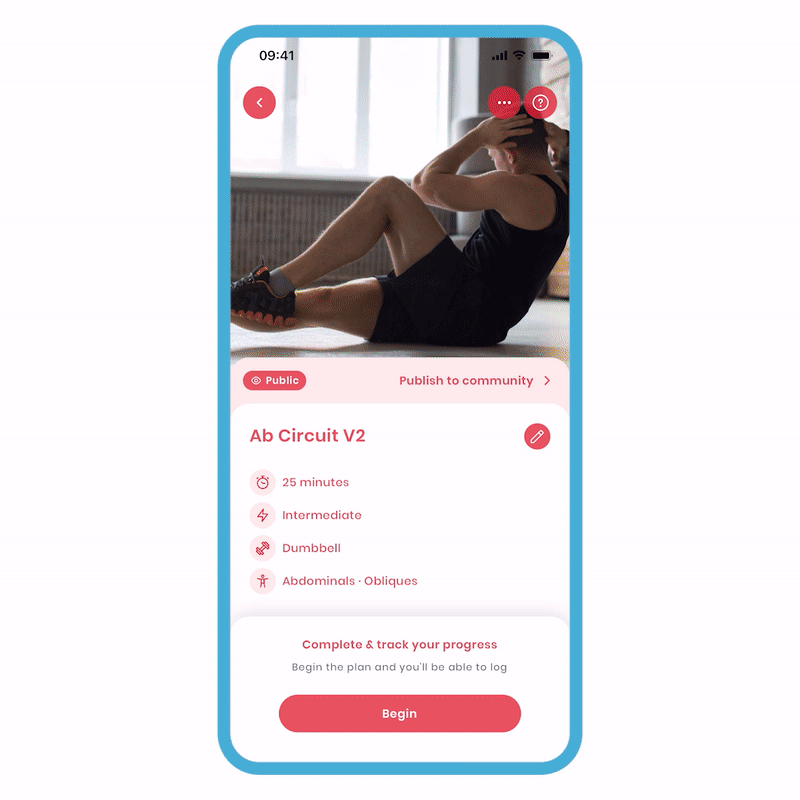
In this tutorial, we will guide you on how to complete a plan using the Quick Log feature. It provides a convenient and efficient way to track your progress.
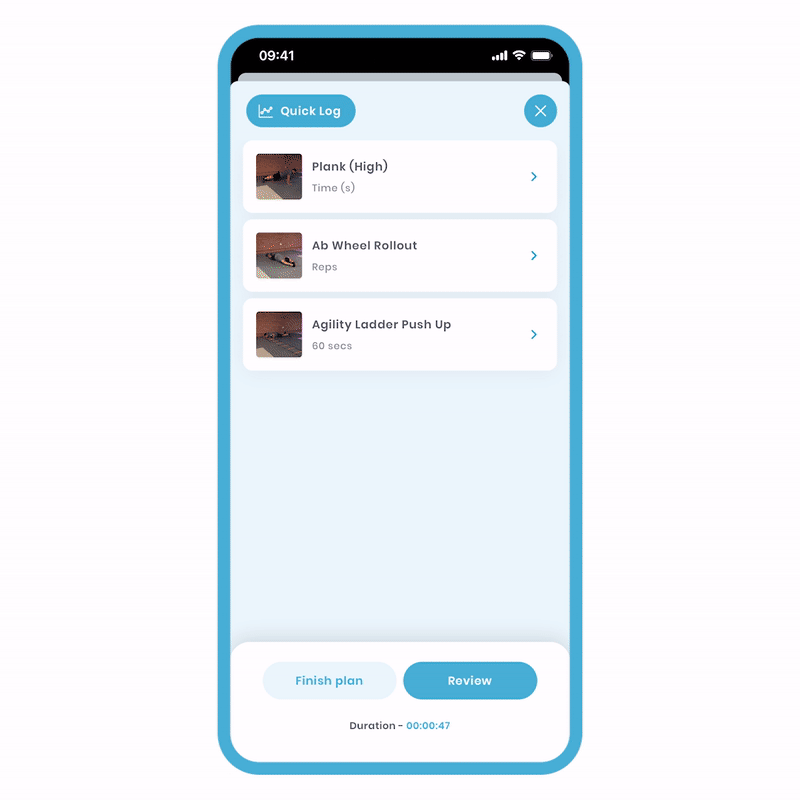
To complete the plan from the Quick Log:
- Fill out your targets for each exercise.
- Press the tick symbol on the right side of each exercise to 'lock in' your entries.
- Once all the ticks are locked in, click on the 'Complete' button located at the bottom of the last exercise.
By following these steps, you will be able to review the detailed results of the plan. Please note that all the targets have been successfully locked in.
If someone has sent you the plan, they will have access to view all the notes and metrics. This feature is particularly useful for professionals to monitor their clients. Further details about this topic will be covered in another tutorial.
Pen & Paper in 2023?
2 History Area Overview
Now, let's explore the functionality of this area and delve into its intricate details. As mentioned earlier, this area plays a vital role in recognising milestones in your journey, and we've provided tools to enhance flexibility. Our future plans involve further enriching this area to maximise its power and usefulness for all users. This section will be divided into the following subsections:
- 2a - Reviewing your plans.
- 2b - Rebooking a session.
2a - Reviewing your plans.
Understanding your exercise history is crucial for your progress. To facilitate this, we have created several tools to help you navigate through your history more effectively. These tools are designed to enhance your overall experience and optimise your fitness journey.
Adding & Editing notes on a plan
Let's explore the process of adding and editing notes on a plan. Notes serve as valuable afterthoughts to capture your reflections on the completed plan. If a professional has shared the plan with you, they will have visibility of your note, making it an effective means of providing feedback to yourself or your coach.
Making a Note on the Exercise:
Please note that adding notes to an exercise is done through the 'Wizard View'. It's important to remember the process of creating notes:
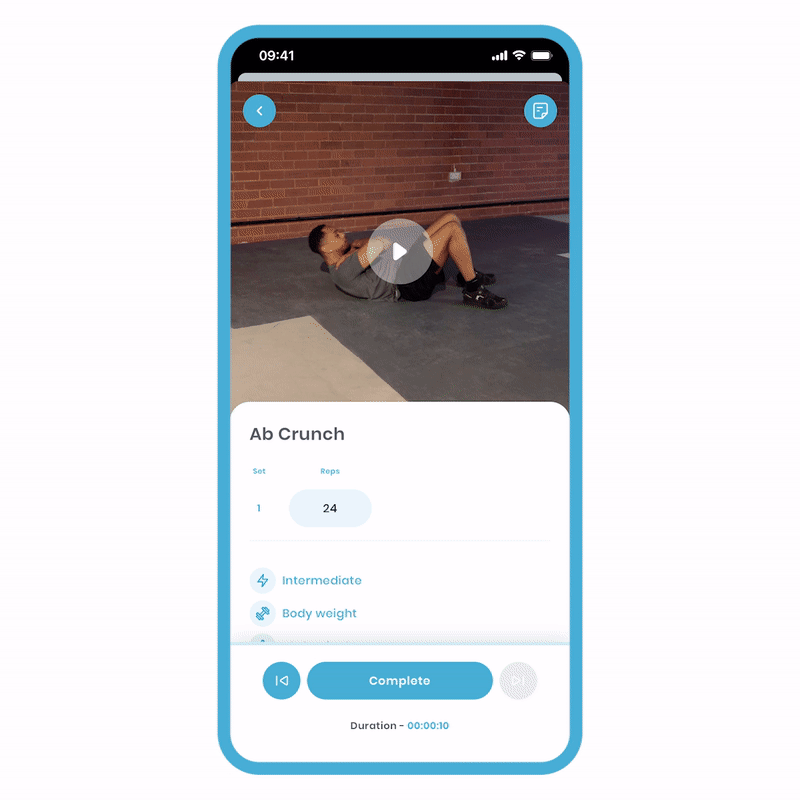
To add a personal note:
-
Complete the exercise.
-
Type your note on the completion screen and click the 'Send' icon. Your note will be logged for that exercise.
If there's a rest period when you write the note, the app will not automatically move to the next exercise to allow you sufficient time.
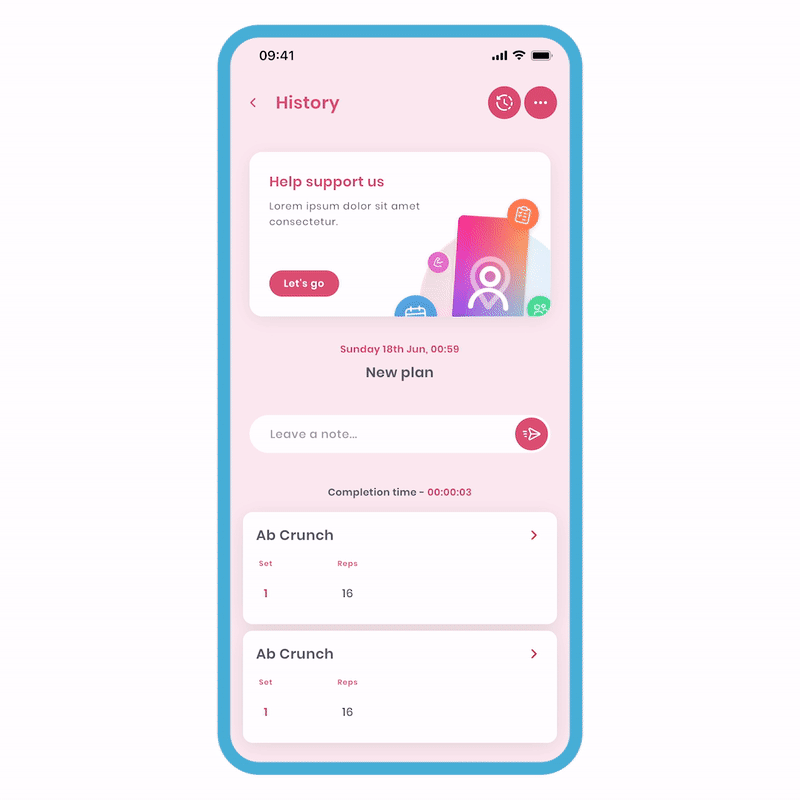
Leaving a Note on a Completed Plan:
What are your thoughts and feelings after completing the plan? This feedback can provide valuable information for both yourself and your coach. Take this opportunity to reflect and share your insights and experiences.
To add a note to a completed plan:
- Select the historic log you want to edit, which will take you to the Historic Overview screen.
- Click on the notes field and enter your note. Click the send icon to save your note.
Once saved, the icon will change to an edit pencil. You can press it to edit your note again.
Editing & deleting a past log
In case mistakes were made during the completion process, we have provided the ability to edit and delete logs from your history. Both of these actions start in the same way.
Editing a log:
-
Select the historic log you wish to edit, which will take you to the Historic Overview screen.
-
Click on the 'more options' icon (three dots) at the top of the screen.
-
Choose the 'Edit' option. Now, you can freely overwrite the historic values.
Feel free to make any necessary changes. Additionally, on this screen, you have access to the Autofill feature, which can significantly speed up the process. Rest assured, we are continuously working to enhance this functionality. Stay tuned for future updates.
Deleting a log:
-
Select the historic log you wish to delete, which will take you to the Historic Overview screen.
-
Click on the 'more options' icon (three dots) at the top of the screen.
-
Choose the 'Delete' option. A confirmation popup will appear asking you to confirm your decision. Click 'Yes'.
Please note that once a log is deleted, it cannot be retrieved and will be permanently removed. Be caution when deleting logs to avoid any unintended loss of data.
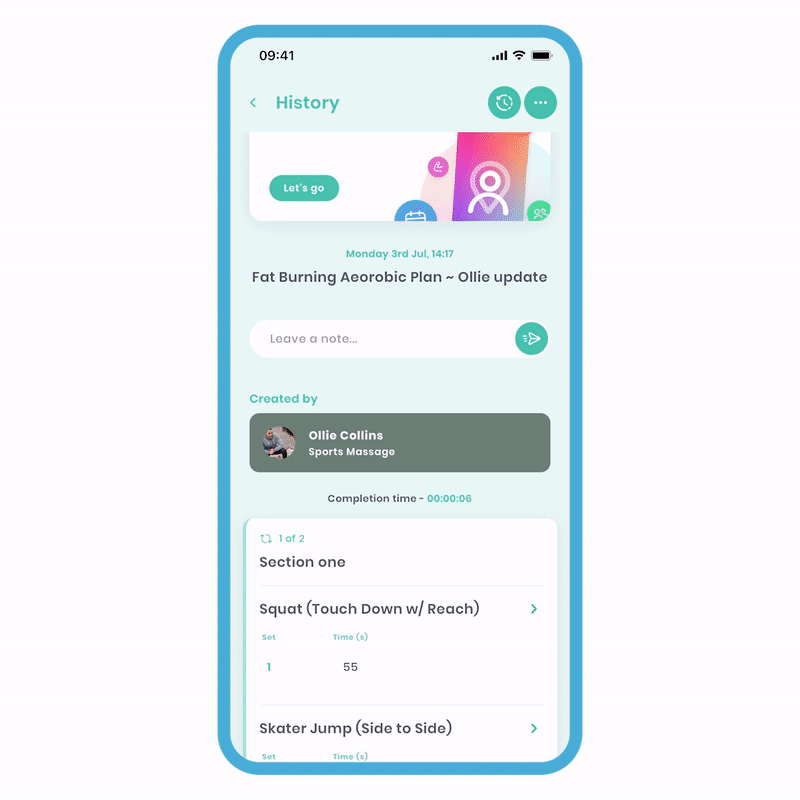
Viewing History Logs
In Fitain, you have the ability to view your previous logs for a plan. These logs are time and date stamped, allowing you to track your progress over time.
To Access the History Logs:
-
Select the plan for which you want to view the history logs and navigate to the Plan Overview screen.
-
Look for an option or icon related to history. Click on it to access the history view.
-
Once you enter the history view, you will see a list of your previous logs, each accompanied by a timestamp indicating when it was recorded.
By reviewing the history logs, you can track your past performance, monitor improvements, and analyse your fitness journey. It provides a valuable record of your activities and progress over time.
Please note that the specific steps to access history logs may vary slightly depending on the Fitain app's interface and design. However, the general concept remains the same – accessing a dedicated section or option to view your previous logs with timestamps.
Green and Red Arrows
When using Fitain and reviewing your history logs, you may encounter green or red arrows associated with logged entries. These arrows indicate performance changes compared to previous completions.
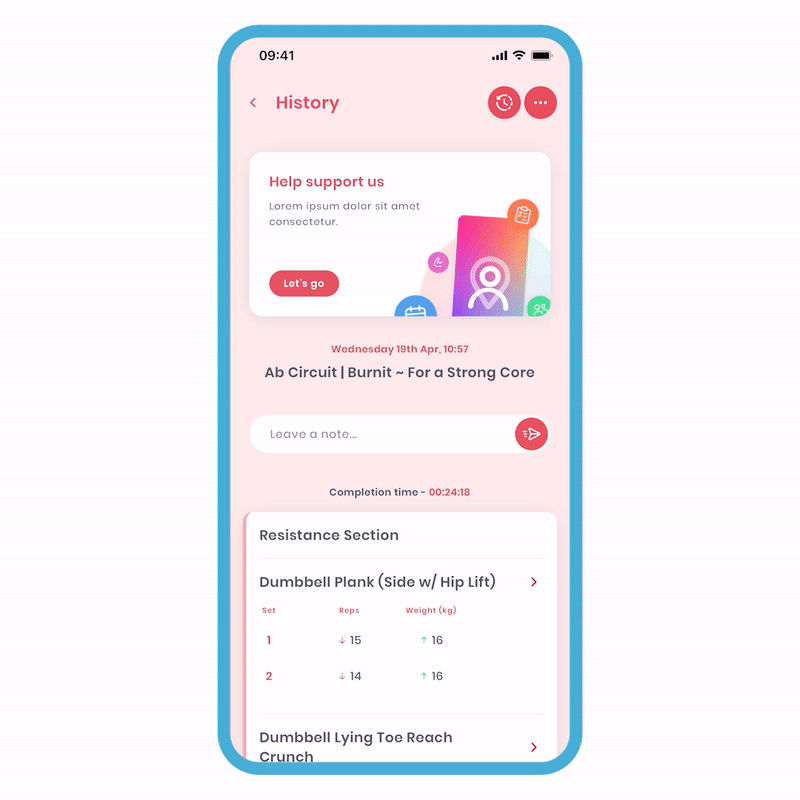
Arrow meanings:
- Green arrow: Indicates higher current metrics, such as rep or weight kg increase.
- No arrow: Indicates no changes.
- Red arrow: Indicates lower current metrics, but exceptions apply for scenarios like running faster over the same distance.
Observing these arrows helps track performance changes over time, objectively assessing progress and identifying fitness trends. They provide valuable insights into your evolution and adaptation to Fitain plans.
Note: Green and red arrows require completing a plan at least twice to appear, providing direction to your progress.
2b - Rebooking a session.
As a professional, we have made it convenient for you to efficiently rebook the same session with just a few clicks.
To rebook from history:
- Select the historic session log, taking you to the Historic Overview screen.
- Click 'Book again' at the bottom.
- Choose an available day and time, review the details on the receipt screen.
- Click 'Confirm and create'. A new invitation will be sent to the participant.
Please note, this is only available for bookings with a single participant. Ideal for providers offering 1-to-1 bookings.